SAVING YOUR INSTAGRAM PHOTOS
You can download all your photos (or a specific range) by using a free software called “Instaport.”
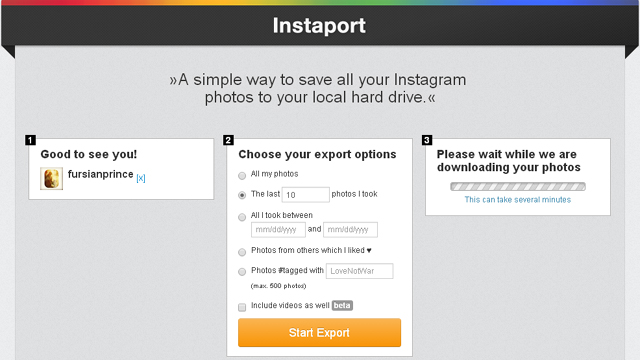
1. Access Your Instagram With Instaport
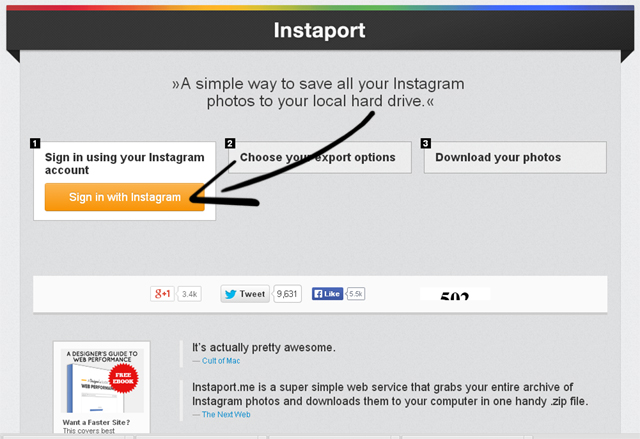
Go to the Instaport website (instaport.me) and click on the “Sign in with Instagram” button. It will redirect you to sign into your Instagram profile.
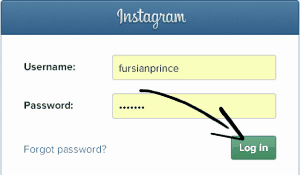
Put in your username and password then click “Log In.” Instagram will then ask you to allow Instaport to access your photos.
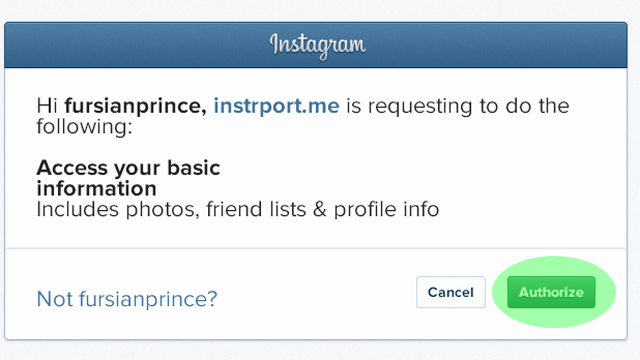
Click “Authorize.”


2. Choose the Range of Pictures You Want

You have the option of downloading all your photos, setting the number of most recent photos, a date range, photos you’ve liked, photos with specific tags and you can also include your videos (though that option is in beta).
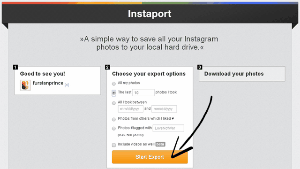
After you’ve selected your range, click on “Start Export.”
Instaport will start downloading all the photos you requested into a zip folder that you can save onto your desktop. Depending on how many Instagram photos you requested, it can take several minutes.


3. Download Your Photos
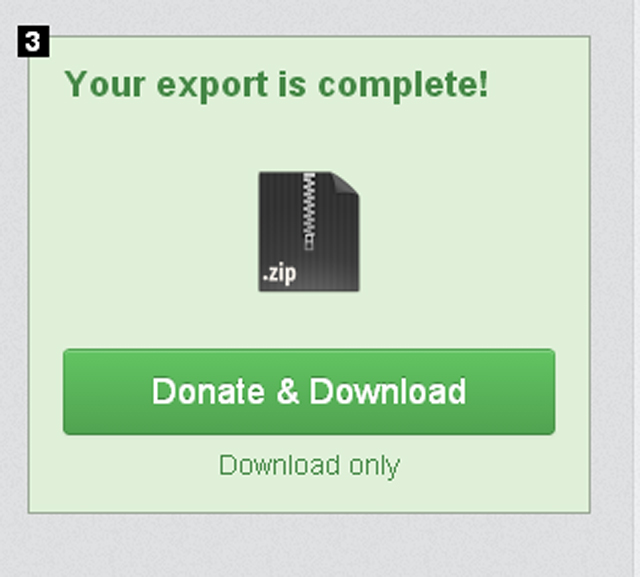
Once your zip folder has been created, you can simply download it by clicking on “Download Only.” Keep in mind, since Instaport is a free product, developers always appreciate a donation to help keep the software up-to-date.
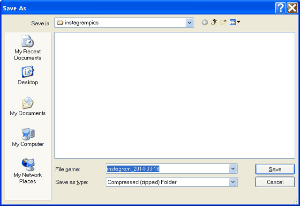
Save the zip file on your desktop or in a specific folder.

PRINTING YOUR INSTAGRAM PHOTOS
After downloading your Instagram photos, you’ll need to extract them into a folder and place them into Microsoft Word in order to print them out.
1. Extract the Photos From the Zip Folder (Windows)
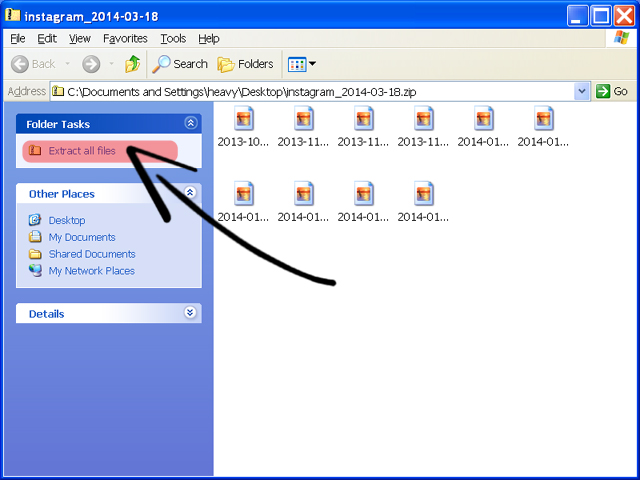
Open the zip folder that has your Instagram pictures. In the far left, click on “Extract All Files.” The Zip File Wizard for Windows will pop up.
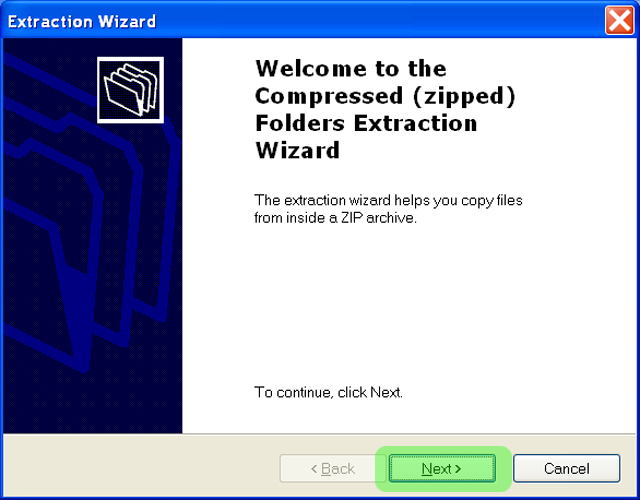
Click on “Next.”
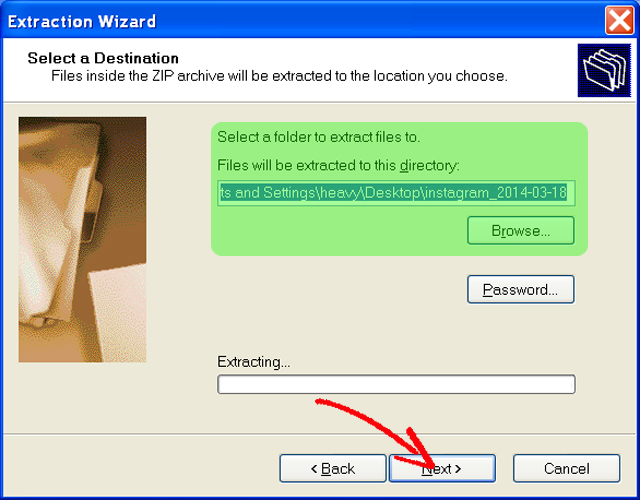
You can choose where you want the files to be saved. Windows defaults to saving them to the same place where the opriginal zip folder is saved. In this case, it’s the computer’s desktop. Click on “Next” and on the final window click on “Finish” to see all your photos.


The video above shows how to extract the files from your Instagram zip folder.
2. Insert Your Instagram Photos Into Word
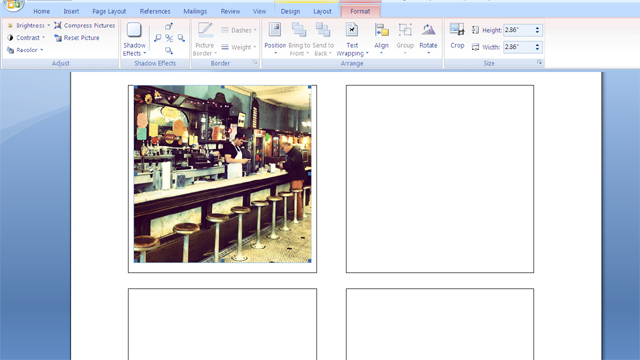
Using Microsoft Word isn’t always the best tool for layout, however for the purpose of simply printing Instagram pictures it will do just fine. Download our template and save it to your computer.
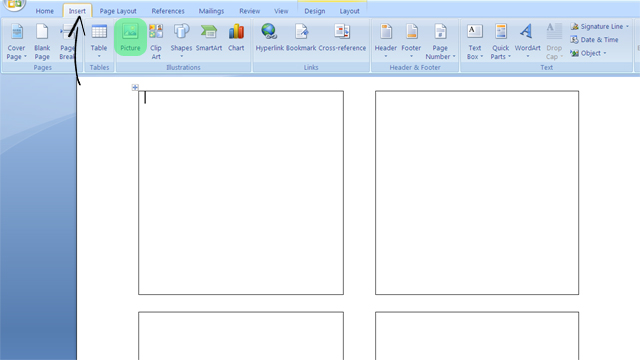
Click on “Input” at the top and then click on the picture icon. A window will pop up where you can choose the picture you want.
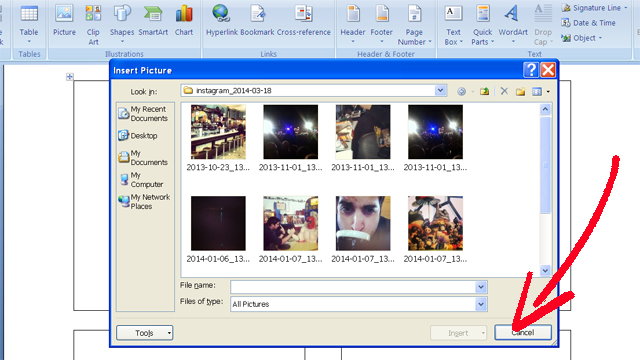
Navigate to your Instagram folder and double-click on the photo you want to upload first. Once in the box, you can resize the photo by holding dpown the SHUFT key and dragging the corners.
Below is a video on how to input photos.
3. Print the Page
Once you’re finished, simply go to File then print the page! For better colors, be sure to use glossy photo paper.