It’s become almost impossible to find solar eclipse glasses at a reputable retailer. There hasn’t been a solar eclipse in the contiguous United States since 1979, so there’s a lot of interest in it.
Is it possible, though, to make a solar eclipse viewer at home? Luckily, there a lot of instructions available for solar eclipse DIY projects. One of the most interesting projects is a solar eclipse box and pinhole projector (you can make a pinhole projector even if you don’t have a box).
According to Boy’s Life, “This type of viewer is also known as a pinhole projection because the image of the eclipse is projected through the pinhole onto the viewing surface. You will be looking at a projection of the eclipse instead of looking directly at the sun.”
You do not look directly at the sun/solar eclipse using a solar eclipse box or viewer. And you absolutely should not. NASA says you can seriously damage your eyes if you look directly at a solar eclipse. However, this DIY project provides a creative and fun method for you to view the solar eclipse without looking directly at it. It’s fun for kids too. Below you will find detailed instructions as well as several videos that walk you through the process.
Here’s how you do it:
Needed Supplies
Fox17 says you’ll need only seven items to make your pinhole project/solar eclipse box: “cardboard box, sheet of white paper, aluminum foil, tape, scissors, pen or pencil, pin or thumbtack.”
You can use a cereal box, according to NASA. There’s an instructional video you can watch below for that method. The NASA approach calls for these items: “An empty cereal box, scissors, tin foil, tape, a piece of white paper, a nail (or something sharp to make a pinhole.)”
You get the point. You can find many instructional handouts online but they pretty much all call for the same thing. The variations come mostly in what you use for the box (a shoebox would work too or any cardboard box really), and what you use to make the pinhole (nail, pin, thumbtack, etc.) Obviously, children shouldn’t use sharp objects without supervision.
If you don’t have all of those supplies, you can build an even simpler pinhole projector. According to the American Astronomical Society, “a convenient method for safe viewing of the partially eclipsed Sun is pinhole projection. You simply pass sunlight through a small opening (for example, a hole punched in an index card) and project an image of the Sun onto a nearby surface (for example, another card, a wall, or the ground).”
National Geographic also has detailed instructions for a simpler pinhole projector: “Make a simpler version of the solar eclipse viewer with two thin but stiff pieces of white cardboard. Punch a small, clean pinhole in one piece of cardboard and let the sunlight fall through that hole onto the second piece of cardboard, which serves as a screen, held below it. An inverted image of the sun is formed. To make the image larger, move the screen farther from the pinhole. To make the image brighter, move the screen closer to the pinhole.”
Boy’s Life provides a similar list of supplies but swaps out a pocketknife for the scissors: “Small box with a lid (A shoebox is perfect.) Small square of aluminum foil. Small square of white paper. Utility knife or hobby knife. Tape. Pin.”
Steps to Make the Solar Eclipse Box/Pinhole Projector
The Fox17 method provides a list of five easy steps: Trace the box bottom on your sheet of paper. Cut out the rectangle traced. “Tape it to the inside on one end of the bottom of the cardboard box. This now becomes your projection screen.” Next, close the box, “cut two holes on either end of the opposite side of the box. Tape closed the remaining portion of the box top. Cut a piece of aluminum foil to cover one of the holes and tape it in place. Poke a small hole in the middle of the piece of foil.” That’s it!
The NASA approach in the above video calls for these steps: Empty the cereal out of the box. Put the box on the white paper, and trace the bottom of it. Cut out the shape you’ve traced. Tape the shape to the inside of the box “on the bottom.” Now, “Close the top of the box. Cut out two square holes on the left and right sides. Place the tin foil over one of the holes. Tape it down. Put a pinhole in it.” That’s according to Quartz.
Boy’s Life provides step-by-step instructions with photos if that helps.
How to Use It
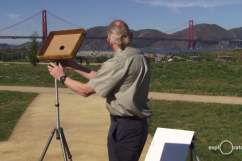
Go outside and face away from the sun “so that the light will shine into the pinhole. Look into the open hole of the box that you did not cover with aluminum foil and you will see the sun projected on the white piece of paper inside the box,” according to Fox17.
Quartz also suggests, “You’ll hold the box up, like a flute, so that the so that the eclipse can reflect onto the tin foil.”
You can learn a more elaborate method here:
Learn how to make DIY solar eclipse glasses here:
