Go to main menu
Go to search form
Heavy
Sports
Alerts
Hi,
Subscriber
Search
Sports
News, stats, rumors, predictions and roster moves around the NFL, NBA, MLB, NHL and more.
More From Sports
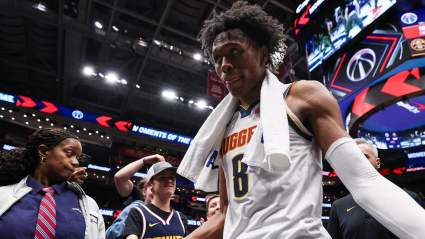
Nuggets Free Agency: 3 Possible Peyton Watson Threats Revealed
46 seconds ago
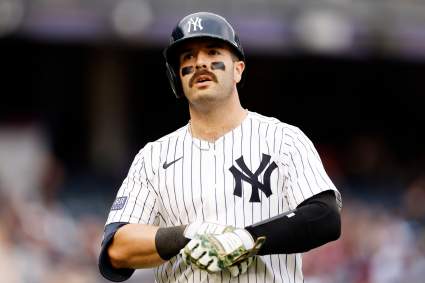
New York Yankees Announce Austin Wells Decision Before Royals Game
1 minute ago
UFC Legend Georges St-Pierre Explains Why He Hated Fighting
7 minutes ago
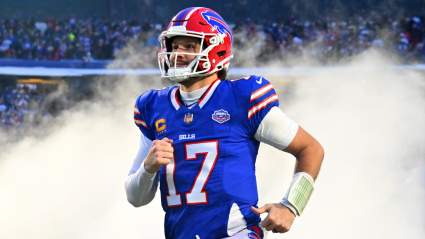
Josh Allen Reveals Advantage Bills Will Gain in 2026
9 minutes ago
Mets Reveal Major Francisco Lindor Development Before Reds Series
13 minutes ago
Warriors Proposed Blockbuster Trade Pairs $133 Million Star With Steph Curry
12 minutes ago
Former Yankees Infielder Struggling in Mexico as Career Continues
21 minutes ago
Statistics Debunked Thunder’s Long-Standing Public Perception vs Spurs
22 minutes ago
Broncos Legend Calls Out Bo Nix Situation After ‘Setback’
23 minutes ago
Suns’ Collin Gillespie Speaks Out on Teammate’s All-Defense Snub
29 minutes ago
Chiefs Advised to Target 12,000-Yard Rival WR to Help Patrick Mahomes
33 minutes ago
Giants Kayvon Thibodeaux Trade Idea Lands Premier 2027 Draft Pick
36 minutes ago
Cardinals LB Jack Gibbens Believes in Turnaround, Comparing Arizona to Patriots
48 minutes ago
Gael Monfils Gets Emotional Over Wife Elina’s Letter at French Open
50 minutes ago
Texas’s Steve Sarkisian Drops Telling Response on Potential NFL Move
56 minutes ago
Lakers Add ‘Literal Rocket Scientist’ in Major Front Office Shakeup
44 minutes ago
Vikings Predicted to Release Beloved Defender Before 2026 Season
60 minutes ago
Giannis Antetokounmpo ‘Intrigued’ by Potential Celtics Trade
1 hour ago
Seahawks Expensive New Addition Dubbed With ‘Most Exciting’ Hype
1 hour ago
Warriors Proposed Trade Lands $193 Million Former MVP Next to Steph Curry
32 minutes ago
Phillies’ Bryce Harper Admission Makes Rhys Hoskins Exit Sting Again
1 hour ago
Former Braves 4-Time Gold Glove Winner Playing in Mexico After Retirement
1 hour ago
Cincinnati Bengals Urged to Reunite With $101 Million Pro Bowl Talent
1 hour ago
Eagles Urged to Reunite With Former $40 Million Super Bowl Champion
1 hour ago
Hardik Pandya Faces New Criticism & Trade Rumors Following Grim IPL Exit
1 hour ago
Red Sox Marcelo Mayer Gives Honest Thoughts on Slow Start to MLB Career
1 hour ago
Blue Jays Receive Bad News in Pursuit of Starting Pitcher
1 hour ago
Tiger Woods Honors His Father in First Instagram Message Since DUI
1 hour ago
Colombia Announces Squad for 2026 FIFA World Cup
1 hour ago
Bears Urged to Trade for 55-Sack Pro Bowler to Address Major Team Need
2 hours ago
More from Sports
Load More Sports ↓
Close sidebar
Home
NFL
Expand sub-menu
Arizona Cardinals
Atlanta Falcons
Baltimore Ravens
Buffalo Bills
Carolina Panthers
Cincinnati Bengals
Cleveland Browns
Chicago Bears
Dallas Cowboys
Denver Broncos
Detroit Lions
Green Bay Packers
Houston Texans
Indianapolis Colts
Jacksonville Jaguars
Kansas City Chiefs
Los Angeles Chargers
Los Angeles Rams
Las Vegas Raiders
Miami Dolphins
Minnesota Vikings
New England Patriots
New Orleans Saints
New York Giants
New York Jets
Philadelphia Eagles
Pittsburgh Steelers
San Francisco 49ers
Seattle Seahawks
Tampa Bay Buccaneers
Tennessee Titans
Washington Commanders
NBA
Expand sub-menu
Atlanta Hawks
Boston Celtics
Brooklyn Nets
Charlotte Hornets
Chicago Bulls
Cleveland Cavaliers
Dallas Mavericks
Denver Nuggets
Detroit Pistons
Golden State Warriors
Houston Rockets
Indiana Pacers
Los Angeles Clippers
Los Angeles Lakers
Memphis Grizzlies
Miami Heat
Milwaukee Bucks
Minnesota Timberwolves
New Orleans Pelicans
New York Knicks
Oklahoma City Thunder
Orlando Magic
Philadelphia 76ers
Phoenix Suns
Portland Trail Blazers
Sacramento Kings
San Antonio Spurs
Toronto Raptors
Utah Jazz
Washington Wizards
MLB
Expand sub-menu
Arizona Diamondbacks
Athletics
Atlanta Braves
Baltimore Orioles
Boston Red Sox
Chicago Cubs
Chicago White Sox
Cincinnati Reds
Cleveland Guardians
Colorado Rockies
Detroit Tigers
Houston Astros
Kansas City Royals
Los Angeles Angels
Los Angeles Dodgers
Miami Marlins
Milwaukee Brewers
Minnesota Twins
New York Mets
New York Yankees
Philadelphia Phillies
Pittsburgh Pirates
San Diego Padres
San Francisco Giants
Seattle Mariners
St. Louis Cardinals
Tampa Bay Rays
Texas Rangers
Toronto Blue Jays
Washington Nationals
NHL
Expand sub-menu
Anaheim Ducks
Boston Bruins
Buffalo Sabres
Calgary Flames
Carolina Hurricanes
Chicago Blackhawks
Colorado Avalanche
Columbus Blue Jackets
Dallas Stars
Detroit Red Wings
Edmonton Oilers
Florida Panthers
Los Angeles Kings
Minnesota Wild
Montreal Canadiens
Nashville Predators
New Jersey Devils
New York Islanders
New York Rangers
Ottawa Senators
Philadelphia Flyers
Pittsburgh Penguins
San Jose Sharks
Seattle Kraken
St. Louis Blues
Tampa Bay Lightning
Toronto Maple Leafs
Utah Mammoth
Vancouver Canucks
Vegas Golden Knights
Washington Capitals
Winnipeg Jets
More Sports
Expand sub-menu
College Basketball
College Football
Cricket
Formula 1
Golf
NASCAR
UFC
WNBA
Olympics
Pro Wrestling
Heavy on Soccer
Tennis